Quantcast
Channel: A fetish leathercrafters journal
Viewing all 77 articles
Browse latest View live

Boot Breather Gallery

$
0
0
I am happy to present a selection of photos of the final Boot Breather. I think the experiment was a success, although I won't know for sure until we've done some extensive real-world testing...
The 1.25" buckles are definitely overkill in terms of what would be needed to do the job of holding this device in place, but they lend a rugged, heavy-duty feel to the piece, and they closely match the sketch. I'm glad I didn't go smaller.
 I initially thought the boot breather would be made of molded veg-tan leather, but that would require a wood form to mold on, and this turned out to be a sufficient way to test out the idea in the real world.
 I'm happy to report that the boot seats onto the breather with a satisfyingly snug fit. 
 For those of you who are wondering "who the heck would want such a thing?," I can only say: The things I make are certainly not for everyone. 
 But for those who do appreciate such things: ardent boot fetishists, fans of breath control, leather enclosure freaks, sensory overload seekers: this could be right up your alley. You know who you are. 


Thanks for visiting...

Butterfly SJ with Padded Hood Studio Shots

$
0
0
I love how this jacket came out... It's so surreal and otherworldly. Must do more with foam, layering and reinforcement. So much still to do...


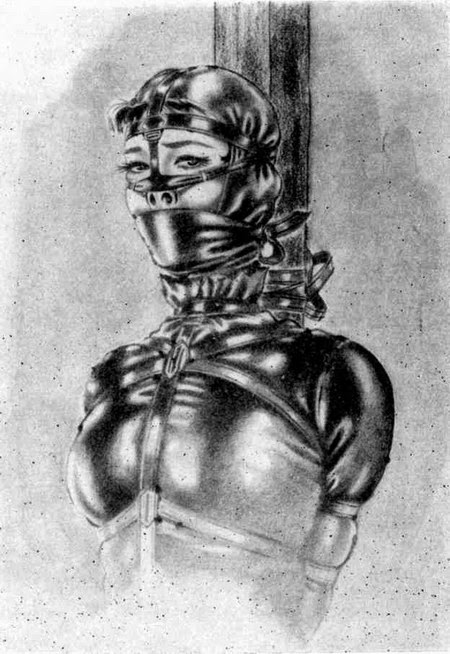
Bondage Art by Takashi Shiwa

$
0
0
Not sure why it took me so long to discover the art of Takashi Shiwa, but now that I have I'm happy to share it with you. Thank you, internet!


More to be found with a quick google search.

Alice Auaa Fall 2014 Closeups

$
0
0
I found a series of closeup images from the Alice Auaa Fall 2014 show, which continues to haunt my imagination... just beautiful, stunning work. 


A Random Collection of Images...

$
0
0
We probably have access to more images than any previous generation thanks to the internet… I can literally spend hours on tumblr browsing through random images taken out of context by people who re-post. The decontextualization lends a kind of mystery that always makes me curious about the image, its origin, who created it and why. I don't know what ties the following together other than I find them visually arresting and inspiring for one reason or another. 


Alexander Wang 2013


20 Questions for PD of InSex

$
0
0
I came across a list of things I wanted to ask if I ever had the chance to interview PD from InSex. I never got the opportunity, but figured I'd share the list as sort of an open letter. You never know, he might actually see it some day...

1. Very early on the insex site there were image of males (a man) in bondage. Was that you? Do you have any experience of the submissive side of S&M? If so does this influence your work? 


2. You posted a PDF of a hood pattern online a while ago, one of the few I was able to ever find online. What was your thinking behind sharing the design?


3. Over the years you have used a lot of incredible gear that is completely custom-made. I am thinking of the many hoods, collars, armbinder, latex stumped sheath, stratjacket, sleepsack. Do you make or have made the custom gear you use? Do you design it yourself? How involved are you in the design/production process? 


4. What is the story behind the fiberglass cocoon? Was that something you dreamed up? Who produced it? 

5. How do you find your models? You seem to use a lot of women who aren’t necessarily in “the business”. 

6. Is there a decent living to be made doing what you do? Or, do you do it regardless of the money? 


7. Do you consider yourself an artist who happens to work in the medium of S&M? Is the performance more important, or the product of the act (the videos and pictures produced) more important?

8. Who inspired you in terms of doing what you do? Do you have any fetish/bondage heroes? 


9. If you could have dinner with any historical figure, or any person living or dead, who would it be? 

10. Do you have a wife/girlfriend/significant other? Do you ever develop feelings for the girls you shoot with? 

11. Do you ever get bored doing what you do? Has it become routine?

12. What you do, is it a Job? A lifestyle? An obsession?


13. Do you think bondage is part of human nature? Does it scratch some sort of primal human itch?

14. What do you do on your time off? Any non-kink hobbies?

15. When did you first know you might be a little different?


16. What will bondage/S&M be like 100 years from now? 

17. Who is your mortal enemy? 

18. Do you have experience as a more traditional artist: painter/photographer? What were you going to be when you grew up? 


19. If you could change anything about the world, what would it be? 

20. Favorite meal? 

Submitted by Christopher 

1/31/12

Some nice armbinder pix from Dave and Elizabeth Andrews...

$
0
0
Elizabeth Andrews was kind enough to send along some images of the patent zipped armbinder I made for her being put to good use in one of their recent videos. It always makes me happy to see the gear in action! Thanks Liz...

Dave with his usual attention to detail.
Man, I wish we had this kind of apparel in my office. 
Of course, then we'd probably never get any work done. At least I wouldn't! 
You can never be too shiny in my opinion. 
I think the clip lives here at their "Office Perils" site... search for Johannie.

JIm Stewart of Fetters

$
0
0
I recently found a website created by Jim Stewart of Fetters UK and Mr. S Leather fame. It turns out he was quite an interesting character, based on the obituary in the Guardian. I had learned from my friends at Serious Bondage that Mr. Stewart was the creator of the sleepsack and straitjacket patterns that are still produced and sold by Fetters and Mr. S today. Mr. Stewart founded Fetters in London way back in 1976.

Maurice "Jim" Stewart passed away April 1, 2012.
I didn't know until now he also had a background in theater stage and prop design, as well as being an accomplished director and playwright. He also worked with Terry Gilliam to create the straitjackets used in the movie Brazil. I remember those!

His site is being kept online in order to make it accessible to us all, and it does reward the intrepid explorer who isn't put off by the rather confusing link structure and old-school design. It very much feels like a work in progress by an enthusiast covering a wide range of BDSM sub genres: topics include chastity devices, sleepsacks and straitjackets, bondage escape challenges and lock-on clothing. And of course, Houdini. There are tantalizing bits of text in the site: placeholders and notes to himself, including: "Find images of original designs not previously in other supply catalogues." I sure would love to see what he's talking about there...

I've highlighted a few links below to get you started:

A History of Fetters
  Index page

 Bags & Sacks Index


"Male" sacks


So I like to get tied up, so what?

Houdini Connections Home Page

Armbinder Dress from PJW

$
0
0
I love the idea of restraint built into ordinary (or not-so-ordinary looking) clothing. These images are from my friend PJW (AKA Hazy Cosmic Joe), who is always coming up with great bondage ideas... You can see more of his work here on Deviantart

Be careful on those stairs my dear...

Harness Hood modeled by Chloe Calypso

$
0
0
I am lucky to have worked with the amazing Lew Rubens in the past, which means he sometimes sends me photos of the projects he's working on and models wearing my gear. It's fun to see something in the ol' inbox from Lew, every time! 

These were a couple of cell phone snaps of Chloe Calypso (which I've doctored a bit) for your viewing pleasure. Although taller than the model the armbinder was made for, Chloe managed to somehow squeeze into it after a bit of a struggle...  But I'd say that posture collar fits her just right. 

Thanks for sharing, Lew! 


2014 Boot Roundup

$
0
0
It's a great time to be a boot fetishist (if you are one, you probably already know this) as designers are putting sexy designs into the marketplace with great regularity nowadays. Every season a fresh crop of new ideas and innovative styles pop up that push the boundaries of materials and technique even further than before. And they don't shy away from blatant, sexy S&M styling. 

All strapped up YSLs.

I'm interested not only for the fetish angle, but the design details as well. I always get inspiration for features that could be integrated into leather craft designs or bondage gear. To me shoes are the ultimate design challenge: make something beautiful but functional, completely impractical but totally sellable. Especially for the high-end brands, shoes are one place where selling the fantasy can over ride the rational part of your brain. Nobody needs a pair of 5-inch stiletto boots, but just look at them! Do we want them? Yes, we do! 


 The concept of what a designer would call negative space is a hot trend. Openings that allow the skin of the leg or foot to show through create an interplay of enclosure/exposure. Lots of designs seem to take advantage of laser-cutting techniques - a relatively recent innovation in shoe design. I'm also seeing some interesting things with woven leather (as in the Bailmans below), and almost architectural design elements (Daniele Michetti). Hand work has always been a part of shoe making, and the high end is bringing an almost craft aesthetic to some of their designs. 


Straps are happening everywhere, ranging from subtle contrasting-finish (patent on chrome-tanned leather in that subtle strap on the top of the Ballins), to the add-on almost harness look that is popping up (see the Emilio Puccis). The combination of lacing with additional straps just screams bondage to me, but hey I do see things a bit differently I suppose. 

Brian Atwood's designs are covering a lot of creative angles in use of different textures and materials to create contrast, all the while maintaing that sexy silhouette, and in a range of heights.

And finally Gucci this year had an incredible pair of boots on the runway: these skin-tight super tall beauties in black patent. 
I love the little detail of the horsebit hardware and loafer-style false front on the upper. The fit on the leg is incredible! 
 Unfortunately, by the time these hit the stores the design had been toned down a bit and they didn't fit nearly as close as the runway version. But at least they left us with these beautiful and inspiring photos. 

Boot Binder Sleepsack Part I - Patterns and Prototypes

$
0
0
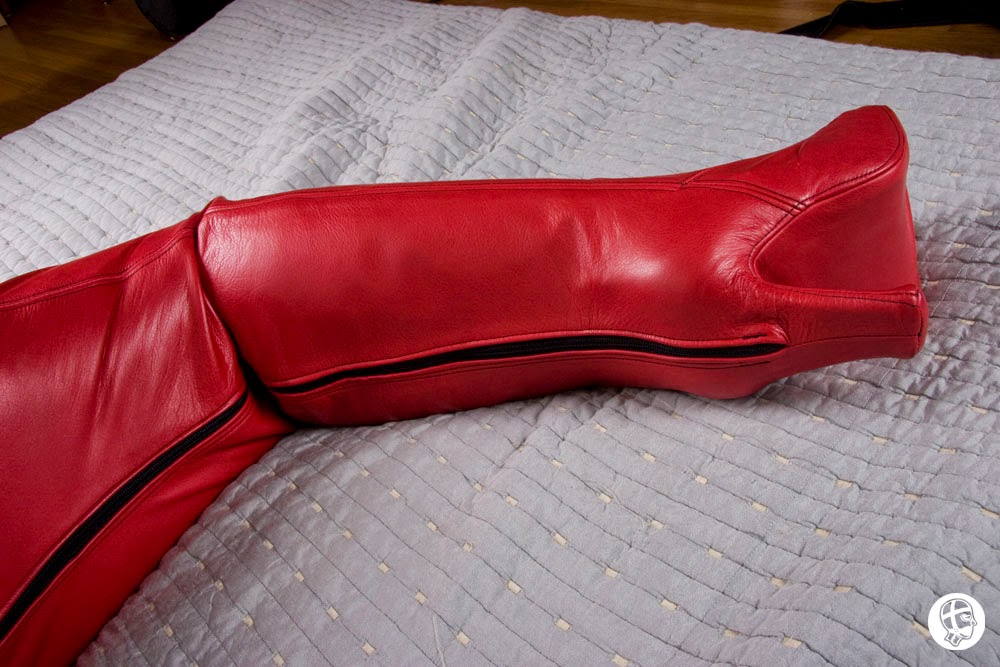
The Plan: to integrate the boot binder foot pocket into a complete-enclosure sleepsack.
The first boot binder prototype.
I've been working many hours lately on a sleepsack with an integrated boot-binder foot pocket - one of my "10 projects." The idea is to have sleeves that position the arms behind the back (as opposed to along the sides of the body, as with most of the sleepsacks I've completed so far) because I really wanted to emphasize the smallness of the model's waist, and create a really elongated look. Plus, how sexy is it going to be that she's in the sack with her boots on? Very sexy! To me, at least...

The foot pocket creates a pretty complex shape. It holds the legs together tightly and creates a small pocket for the heels. 

I begin with the pattern for an existing sleepsack. I have to integrate the pattern for the boot binder pocket into the sack, at just the right position. 


I found that with the model's arms in an armbinder, the waist could actually be made a bit tighter. They take up less room within the sack when they're behind her back than they would at her sides. Of course, my model thinks I'll take any excuse to make something tighter. I can't really argue with her on that one...
The image below shows the 4 foot-pocket shapes pretty clearly. The extended straight toe of the front panel, the heel extended on the rear panel, the toe piece which also creates the side of the foot pocket, and the bottom piece which forms part of the heel pocket as well. 
Once I got the pattern to where I was happy with it, I start sewing the pieces to create the prototype out of red vinyl. (Side note: She liked the red so much I decided to make the final in red for her as well!)
Even though I don't worry about gluing down the seam allowance, I still topstitch the seams to make them lay flat. I don't want to torture my model too much... Otherwise she may stop playing with me altogether. 
All the darts and other design elements get stitched. 
One tricky part is getting the piece near the foot pocket to align. You can get into trouble with precision alignment along long seams with leather, as it stretches and moves as you sew it. It's always best to design with this idea in mind, as it can create asymmetry in you final piece if you're not careful. 
I'm trying to make sure all 3 pieces come together on this one before I start sewing. 
But it's a tricky connection: Go to far, and you have a pucker. Don't go far enough, and you can end up with a gap. You definitely don't want either. 
Spoiler alert: I found a better way to do this. But I'll save that story for later. 
At this point, you can see the seams aligned pretty well. The heel pocket and side panel look just about right. See the lines lining up? 
One of the hardest things I do is sewing 2 differently shaped curved pieces to each other. The toe-pocket in particular had some tight curves that proved to be challenging. The best strategy is to keep the seam allowance on both pieces as consistent as possible. That way you can tell if they're lining up or not as you are going along. 
Coming along...
I found at this point some areas where the pattern needed adjusting. This is exactly why you test things out, and proof the pattern before making it in leather. Edits get made directly to the paper pattern. Immediately (before I forget). 
Lots of clips are employed to hold the bottom of the foot pocket in place. 
And after sewing...
This is looking pretty good. 
Starting to come together...
Now for the rear closure. 
Just need to clip and sew a couple of inches at the bottom. 
Then set in the zipper, and topstitch in place. 
Yes. 
Yes...
...and yes. Looks pretty cool!
Cut to a few days later, and we've had a time to try it on. So, how did it go? Let's just say it was super-tight. I actually got it zipped up, but not without a struggle, and promise of a future shopping excursion. 
Even with a vinyl that could stretch, there was some seams that needed adjusting. The bonus of using red: it made it easy to mark notes on the actual prototype. 
Of course, this prompted a bout of itching on behalf of our long-suffering model, which meant I had to work quickly in order to not incur her wrath. It's bad enough that the vinyl is smelly, and doesn't breathe... That's why: no pictures. I had to get done and get her out. 
The good news is: prototype #1 gave lots of great feedback. 
I had a set of precise instructions for edits to the pattern. 
And best of all: the foot pocket fit perfectly. Or at least as close to perfect as I can make it. 
More to come...


PD's Insex Hood Pattern Circa 1999

$
0
0
Someone asked me if I had a copy of the hood pattern PD posted a long time ago on InSex since I mentioned it in my "20 Questions" post.  I managed to find a copy in the archives, and if you want you can download the original PDF here.  

The original drawstring hood pattern posted by PD circa 1999.

The hood is kind of a fitted bag which tapers at the top and provides some space for the nose while remaining un-contoured at the neck. The design calls for a drawstring just beneath the jaw, which can pull the hood tight and wrap around the neck. Another devious and ingenious design from the mind of PD. Rather simple construction, and a design that would fit a wide range of models. 


A 20 Questions update: I found out that PD does have a FetLife account and tried to contact him there, and also purchased the movie "Graphic Sexual Horror" which is available at Amazon, and is pretty much a documentary about InSex and PD. It answered a lot of questions I had about the man and the site, and I hope to post an update shortly... Thanks to all of you who contacted me with information. 

Boot Binder Sleepsack Part II - Second vinyl prototype

$
0
0
So at this stage the changes and edits to the pattern from prototype number 1 have been made, and the new sack is underway. 

 I'm still working on that tricky seam at the foot pocket. 
 Those 2 radically curved shapes can be a pain to keep aligned while sewing. Hence, lots of clips. 
 I'm getting a good result, and the topstitching is getting cleaner. 
 Makes a pretty radical shape. 


 I give the heel pocket a little more attention this time, trying to sew the little end piece in place. 
 It's another challenge to sew in such a tight little area. 
 I finally manage to get it sewn...
 And overall the foot pocket is looking pretty great. 


Time for a second fit-test...

Boot Binder Sleepsack Part III - Second Vinyl Fit Test

$
0
0
The fit test of the 2nd vinyl prototype went smashingly well. 

The foot pocket fit like a dream. 
The little areas of pattern that were modified from version 1 gave the desired result: still a super-tight fit, but bearable for the model. I was even able to grab my camera and take a few quick shots. 
Every curve and contour from the heels of her boots to her shoulders was beautifully encased. Her hands were tight, but not "get me out right now" tight. 
 The lower section just fit so well, I was very, very happy. This was my Christmas morning a bit early this year. 
 Here's a close-up of the front and side of the boot pocket. It's about as good as it gets. 
 I just had to mark some lines for the internal sleeves, and make some minor modifications at the shoulder to get the fit just right, and the job of the 2nd vinyl prototype was complete. I am ready now to go to real leather. 


Prototype Process

$
0
0
The goal: "Perfection". Oh, that's all? 
I didn’t realize until I started making custom gear how much work was involved in achieving a “perfect” fit. (Or at least as close to perfect as I can possibly get...) As I have worked on a lot of project for different people, I’ve spent a lot of time thinking about it, and come to some conclusions…

The first might sound kind of obvious, but it’s huge: Every body is different. 
We come in all shapes and sizes. Well, duh! 

Everyone has a very different body shape, with widely varying sizes and proportions. Just considering the head, the variations between the overall shape of the head and neck, the position of the features on the face, the shape and profile of the nose, chin, brow ridge, lips, ears - there’s a staggering amount of diversity in the shape and size of individual humans. When you are talking about the whole body, the distribution of weight, shape of the shoulders, chest, back, hips, buttocks, the length of the torso, size of the hands, arm-span, length of legs. There is an incredible range. 

Recessed chins and pointy noses are just two of the countless points of differentiation. 

I know most clothing manufacturers use fit models who usually have “ideal” measurements. But how many people actually match these dimensions? There are probably very few who share that exact sizing. But I imagine all their clothes would fit wonderfully. At least all the ones made by that manufacturer using that model! How many women do you know that can always find jeans that fit? It’s an ongoing challenge for most. Based on the complexity of the shape (or should I say variety of shapes) of different women’s hip, thigh, buttock, waist area, I can appreciate the design challenge of making a perfectly fitted pair of jeans. 

A typical “build-to-fit” process for me takes at least five sessions:


First session: Initial measurements and tape wraps
Have the model assume the desired position, and use plastic wrap and duct tape to create a form in the desired shape. The wrapped form is used to create a pattern, which is used to make a test-fit garment in fabric or vinyl. Ideally this test garment is made in a material that closely mimics the weight, thickness and stretchability of the final garment. 


Challenges: This session is usually hot, stick and uncomfortable. Plastic wrap doesn’t breathe so your model can get sweaty, and the duct tape can be kind of smelly. You will get a workout pulling all that tape off of the roll. Plus it can easily take an hour or more to make a sleepsack wrap. It takes patience and time to go through this part of the process. Head wraps can be invaluable for making a fitted hood pattern, although these days I have master patterns that can be modified to fit most heads without going through that trouble. 

Second session: try on prototype, make notes, measurements and edits to workpiece. 
The first actual “try-it-on” fit session, the purpose is to try on the prototype and check for any problems. Is the fit close, but not too tight? Are the seams well placed? Do the openings end up where they belong? No bulges or bumps? Is it comfortable? Is there any part that could be let out or taken in? These questions are all considered, and if necessary a second prototype is made integrating the changes. Typically I use a centered zipper at the test phase, even if the final is going to be laced. The zipper is faster to put in, and will still give me the answer to the question of how the pattern pieces are fitting together. 


Third session. Check edits or try on prototype #2. 
Often when coming up with a completely new design, a 2nd prototype is necessary. This not only helps me zero in on the fit, but to try out different production techniques as well. Some elements might be tricky to sew, but after sewing something a few times, I start to come up with solutions along the way. I try to keep notes including “Next time” suggestions to myself for later reference. You get a lot of “eureka!” moments when making prototypes. 

Fourth session: Try on actual garment. Check for fit, problem solve, trouble-shoot. 
This is the true test of the final design in the final material. All the work from previous sessions and all the time spent in protoyping hopefully pays off at this stage with a beautifully-fitted garment. In the real world, sometimes this is where new problems arise that were not anticipated with the prototypes. Vinyl and fabric can be used to simulate leather, but sometimes the stretch is different, and something that fit perfectly in vinyl is now too tight in leather. Usually, the experience of wearing the leather version is far better for the model than the duct-tape of vinyl version (which may have been sticky, sweaty and smelly). Any necessary edits at this stage are painful, but more notes and additional edits are made to the pattern if necessary. 


Fifth session: The final result.
We’ve gone though all this to get here: a model in a form-fitted restraint that fits every curve, is tight, but soft, comfortable yet confining. We have a pattern that works, with notes and production techniques that deliver consistent high-quality results. All of  this work for a single restraint that fits a single unique individual, with every curve contour and shape beautifully enclosed. Job well done. And on to the next project!

Boot Binder Sleepsack Part IV - Second fit test

$
0
0
For those of you who are curious to see the 2nd prototype, here's the fit test with the internal sleeves in place:
It fit really nicely, but because the position of the arms was different...

...it made the fit at the shoulders change near the neck. This is why it's so important to do a fit test with any alterations you make: a change in position of the arms makes the shape of the shoulders different. Edits like this can ripple though the entire pattern. So if you still want a skin tight fit, you may have to make adjustments along the way. 


 The whole leg pocket fit was unchanged from the last time. Next time: you get to see how it all turned out.

P.S. Merry Christmas and Happy New Year to all my leather-crafty friends and pervy readers all over the world. Here's to a happy and healthy 2015!

Boot Binder Sleepsack photo shoot setup

$
0
0
Finally had a chance to set up a photo shoot for the boot binder sleepacks. I ended up with two final versions: one with nose holes only, and a second with an open mouth and nipple-access. 
 It's been kind of hard to complete the photo session, with all the holidays and family visits. 
 See below for the whole list:
 These are the boots that inspired the whole thing. Completely unreal looking and drool-inducing for me personally. That color is just so pretty...
 I hope to post images over the next week or so, as I have a chance to go through them. 
Hope your 2015 off to a great start! 

Boot Binder Sleepsack

$
0
0
I love the way this one turned out. So very sexy...

Boot Binder Sleepsack - The Pretty Shots

Viewing all 77 articles
Browse latest View live