Quantcast
Channel: A fetish leathercrafters journal
Viewing all 77 articles
Browse latest View live

Karen Hsiao with pony hood

$
0
0


Karen Hsiao sent over this image a few weeks ago... I really love this photo. I'm sure I'm not the only one a bit jealous of her little pony. She has a show coming up in a couple of weeks that I'm really looking forward to. 


 She's been taking photos and making beautiful drawings... Invitation with information below, hope to see you there. 


Drea Morgan photo sketch comparison

$
0
0
Looking back at the initial sketch I did for the Lew Rubens armbinder/collar combo, it's kind of cool to see the rough idea next to the final piece. Drea Morgan looks incredible in the outfit, but I'm already planning to push a bit further with a tighter-fitting version... I think she can handle it!


Red Armbinder and Hood from Restricted Senses

$
0
0
I've been going a bit nuts lately over the work being done by my friend over at Restricted Senses tumblr site. "Mr. X" has been exchanging emails with me about his projects, including some gear he's been making based on the patterns I've posted. 

He did a great job modifying the armbinder pattern to fit his shapely (and quite flexible) slavegirl. He also is taking and posting countless incredible sexy photos of said gear in use  and sharing with us (for free) because frankly he's just awesome.

 
I swear it makes me want to cry... In a good way! She's so pretty!!!

 My weakness for gorgeous tight-fitting leather gear on a willing and stunningly beautiful Asian model has never been so fully exploited. 

He did mention that he enjoys seeing the feedback, and really that isn't asking for much, is it? 

Dear Mr. X, Please keep up the amazing work, and know that you and your slave are making pervs everywhere very happy. We're not worthy...


Incredible Lockable Leather Suit from Overall Bound

$
0
0
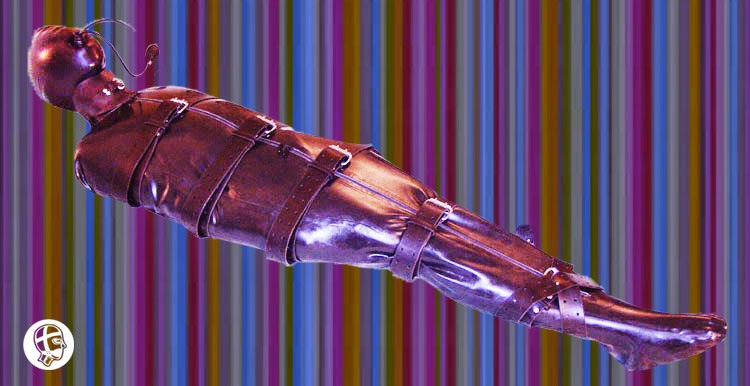
I got an email a while ago from a gentleman (nom de perv: Overall Bound) who had an incredible custom-made bondage suit he had made for himself by a leather artisan. It had an integrated heavy hood which attached with a zipper, making it removable from the body, if desired. This bondage suit is fully leather lined, with smooth leather facing the inside throughout, including the hood. 

The blindfold and mouth zip can be locked in place. 

Pretty much every strap you see can be locked. 
As he mentions: "With the padlock in place on the arm strap, with the arms passed through the central hole and two lateral loops, there’s no way to get the arms free".
 The locking harness covers the rear lacing panel, and the collar (of course) locks on as well. 

There is a two-layered pouch at the crotch - one tight fitting with a hole for the penis, and a second lockable layer to cover everything up. 
"With the padlocks in place, even with the arms free you don’t get out of that suit. With everything one, and wearing boots (he has heavy leather lined boots to go with it too), it’s 100% total leather enclosure except for the two nostril holes". A man after my own heart. 


For the leather enclosure enthusiast, I would think this is kind of an ultimate trip! I wonder if he ever got anyone to take his picture while inside the suit?

Christopher’s Leather Care Tips

$
0
0
I get asked from time to time about the best way to care for leather gear. Here are a few things I've picked up over the years: 

Leather items can last for decades if properly cared for. Age and use can bring out leather’s natural patina, making it more beautiful. It should fit you better too, as it will stretch to conform to your shape over time. 

Dry dust with a soft cloth or vacuum in crevices inside and out before cleaning or conditioning. 

No, I don't actually have my own branded suede brush!


The inside of your unlined leather item (with suede-like nap) can be brushed and cleaned with a brass-bristle suede brush. Follow up with a vacuum to suck up the little bits of nap that may brush off. 

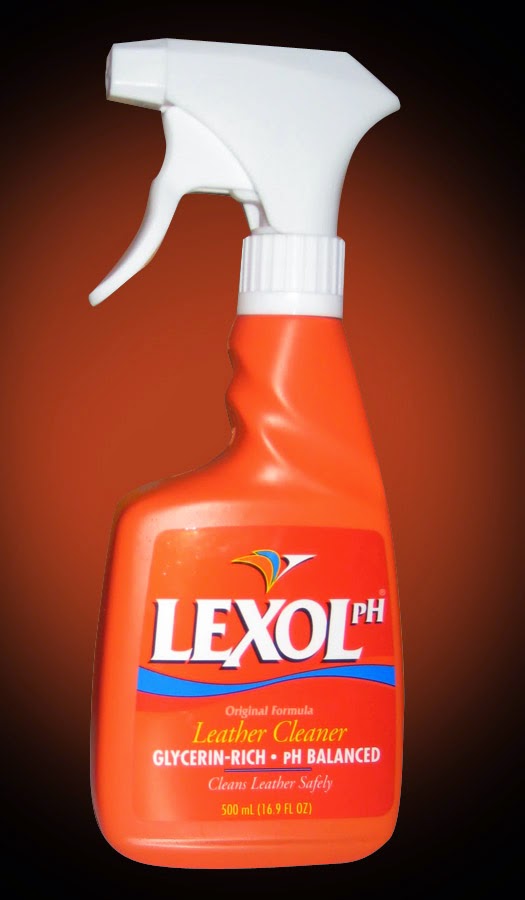
Lexol Leather Cleaner: the orange bottle.

Use Lexol PH Leather Cleaner to spot clean if necessary before conditioning.

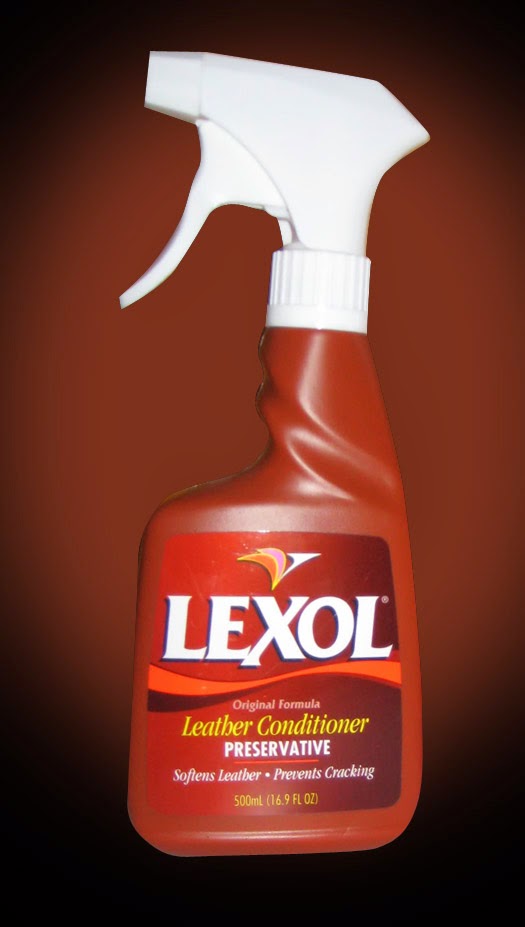
Lexol Leather Conditioner: the brown one.

Use a conditioner like Lexol Leather Conditioner every 6-12 months. Be sure to test it first on a hidden area first to make sure it doesn’t discolor the leather. I like to apply with a soft cloth, then buff with a clean soft cloth and finish with a horse hair brush. 

Horsehair brushes are great for the final buffed finish.


Don’t over condition! You don’t want to clog the pores of the leather, or make it sticky, which can happen if you apply too much or too frequently. 

Note that a conditioner may darken the appearance of the leather. You may want to test a small inconspicuous area first. 

Protect your leather from direct sunlight, which can dry it out and make it fade over time. 

Wipe up spills immediately as they occur with a clean soft cloth.

If necessary, use a lightly moistened soft cloth with lukewarm water to clean a spill. 

Let any damp leather air dry naturally before putting it away. Don’t put it near a heater to speed up drying, as it may result in hardening the leather. 

Do not use soap or heavily soak the leather with water. This may cause more damage than the stain itself.  

Avoid cleaning supplies or soaps, detergents, solvents or bleach. Don’t use furniture polish, oils, varnish, abrasive cleaners or ammonia water. 

Butter and leather don't go together!

Be careful with butter, oil or grease, which can stain leather. Wipe off with a clean cloth, and leave alone. The spot should dissipate after a short period of time. 

Use a chamois to buff out minor surface scratches. 

Store in a cool, dry well-ventilated place, never in a plastic bag! Leather needs to breathe, and can grow mold if kept in a plastic bag. 

A dust-bag can help keep your gear clean, but make sure it’s breathable, natural fiber. 


Avoid strong perfumes or cologne when wearing your leather, as it is porous and will absorb smells quite easily.

Follow these tips, and your leather should give you many years of enjoyment. 

Sleepsack Bondage: Material Types and Trade-Offs

$
0
0
Duct-tape wraps: Inexpensive, extreme, and custom-fitted.
Duct Tape Mummification
This highly effective bondage technique can create the total body bondage, free-floating total enclosure sensation with a modest outlay of cash. You really only need plastic wrap and duct tape, a pair of scissors, a towel for between the knees, (optional earplugs), and you are ready to go. 

The major trade-off with this technique compared to others is the time and effort involved. It can take an hour or more to do a complete body wrap with two layers of tape. It is a lot of physical work to peel all that tape off of the duct-tape roll, and carefully apply it to your wrapee. 

The sensation of tightness can be quite extreme as layer after layer of tape can be built up until movement is nearly impossible. Two layers are great, but three or more starts to get really restrictive. Laying tape strips parallel to the body across the primary wrap can increase the stiffness and prevent bending. 

One of the best features of duct-tape wraps is that you can cut access holes whenever and wherever you like. Vibrators can be inserted or taped into place. Penis or boobs can be pulled through openings, toyed with and then stuffed back in and taped up. It’s flexible in a way that the other methods aren’t, due to its make-it-yourself nature. 

Downside: It can be hot and sweaty to have the plastic wrap next to the skin, and the temperature of the room should be a little on the cool side to prevent overheating. Dehydration over a long session can become a concern. Scissors should always be on hand in order to cut the wrapee loose in the event of sudden panic or other emergency. 

The ultimate trip for the latex enclosure fetishist.

Latex Sleepsack
Latex sleepsacks can be picked up in standard sizes for around $500 (here at Mr. S), and can offer a moderately restrictive bondage experience. Visually these sacks look great, and for the latex fetishist there is nothing better than the idea of being fully enclosed in multiple layers of your favorite material. All of the sensory benefits of latex fetishism are here: the shiny wet-look, the cool tactile sensation, the smell and sound of squeaky rubber. Paired with a hood, you can get the complete enclosure experience, and it’s fun to wear sheath-pants underneath so even if your cock is “exposed” through the front access zipper, you’re really still completley enclosed in latex.

Some people like to use lube between the layers to create a squishy latex wonderland. I found the latex sleepsack (although nice in its own way) wasn’t restrictive enough for my taste, which led me to explore leather alternatives. But the ability to play with lube without worry, and for those who enjoy sweating it out, lube or total latex enclosure, it’s a pretty awesome experience. 

Inflatable latex provides a truly unique sensation - at a price.

Latex Inflatable Sleepsack
Years ago my first big (really big) fetish purchase was an inflatable Ultima sack from DeMask. It had integrated straps on the side that allowed suspension (either head-up or head-down), and cross-body straps in contrasting red latex. This thing was an amazing piece of work, with a thick latex outer layer, and a thinner inner sack. Once inflated, the inner sack pressed against you from all sides. Paired with an inflatable hood, the sensation was almost like being underwater. Gentle restraint pushed back if you tried to struggle, although movement was possible. Being suspended was my favorite, because the overall pressure on your body gave a sensation of weightlessness. But as with the latex sack, I wanted more restriction than the inflatable could offer. Also, sadly the inner latex sack dis-integrated in storage after a couple of years. It was a heartbraking lesson in latex perishability to say the least. 

Neoprene sleepsacks can provide a great experience at a lower cost than leather. 

Neoprene Sleepsack
Neoprene is a relatively new arrival on the scene, and I still remember well the first time I saw a total-enclosure neoprene sack at 665 Leather in LA ($485 for a sack with hood and front access zip here). I was drooling right away, and couldn’t wait to get zipped into one. Unfortunately I was a bit disappointed that it wasn’t more restrictive, although, as with the latex, it’s a pretty cool and different bondage sensation in and of itself. Like the latex, you don’t have to worry about getting the sack wet, and adding a few belts can increase the feeling of restriction. The neoprene has its own kind of padding built-in, so the straps don’t bite as much into the skin. I do want to get another one someday, but more undersized next time so it has to stretch when I get into it. (Can you tell I like it tight?)

It can be quite cosy and comfortable inside, although just like the duct-tape wrap, it helps to have the room temperature a little on the cool side so you don’t overheat. 

The ultimate restraint experience IMHO: a custom sleepsack in leather.

Leather Sleepsacks
A leather sleepsack is a wonderful thing: it’s easy and quick to get in and out of. One pull of a zipper, and you’re totally enclosed. Not surprising, it's my favorite material for sleepsack bondage. 

Because the leather breathes, it doesn’t get all sweaty and clammy inside, as can sometimes happen with a plastic-wrap and duct-tape mummification. 

When a sleepsack is custom-made to fit there are no pressure points and you get a great overall sensation of restraint from head to toe. It makes it easy to float off into sub-space. 

The lacing can be adjusted for tightness, so you can vary the intensity of the restraint. It can feel like a comforting hug or a strict leather prison depending on how much the laces are pulled. 

The lacing adjustment can also come in handy when you want to layer, maybe with a rubber catsuit underneath, or tighten things up over the course of a session. 

The feeling and psychological impact of the sack itself is quite powerful. 


All these are legitimate techniques for playing with the mind-body space, and each can provide a doorway into another world. Sensory deprivation can unhook your mind from the everyday experience, and take you places erotically you never knew existed before. Hopefully my personal experience can help some of you who may be curious about this type of restraint. Have fun and play safe! 

The Y-Chair

$
0
0
Hello pervy people! This post is a reply to one of my FetLife friends who asked about the Y-chair project I made a long, long time ago (I'm thinking sometime around 2002). This Y-chair was my first attempt at making a piece of bondage furniture, and the idea was initially to have something to anchor a girl wearing the F-suit to (which curiously enough never happened). I wanted something that could hold the legs apart, and allow the waist and torso to be completely strapped down. Immobilization with access. 

It ended up being a prop in a photo shoot we did with the amazing Darby, back when I was working with Gnjal of RavensWalk fame (an amazing photographer and all-around creative genius). He took these two pictures of Darby looking fabulous all strapped down. 

The whole thing is on wheels, so once she's buckled in you can move her wherever you like. The legs of the upholstered pad weren't connected with screws, so you could get straps right up close to her crotch. It worked beautifully. 
 These mid-construction photos show some different angles. I didn't have a table saw at the time, so the angled cuts were a bit challenging, but overall I was pretty happy with how it turned out. It's a very sexy piece, and looked great with an armbinder/hood combo and lots of straps. I always loved the shape of the small waist and curvy hips. If I had to do it again today, I'd make some kind of accommodation for supporting or restraining the head. 

Unfortunately, due to a lack of storage space, I had to get rid of it a few years ago - so I gave it away to one of my friends in the bondage industry. But I still see it being used in various productions made by different people from time to time. It's well-built of quality materials, so it should last a long time! Have a happy life, Y-chair...

Asian beauty locked in Total-Enclosure Sleepsack

$
0
0
A total-enclosure fetishist dream come true...
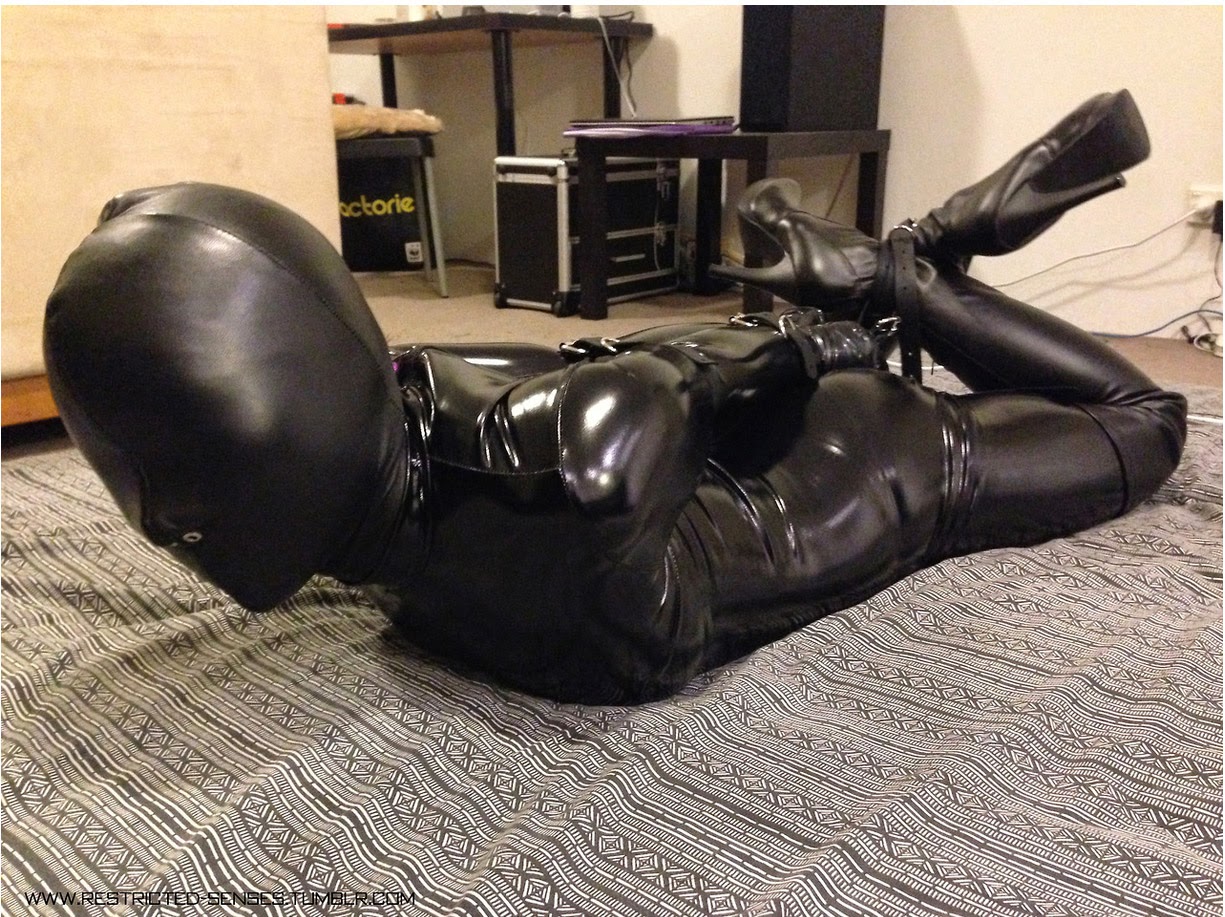
These amazing photos come courtesy of my friend “Mr. X” over at Restricted Senses tumblr. I spoke with him a couple of weeks ago about a heavy leather sleepsack prototype I had that might possibly fit his lovely Asian slave girl. Turns out it was just the right size to fit her, so I sent the diabolical device over for them to put to the test. More specifically I should say: to put her to the test. 

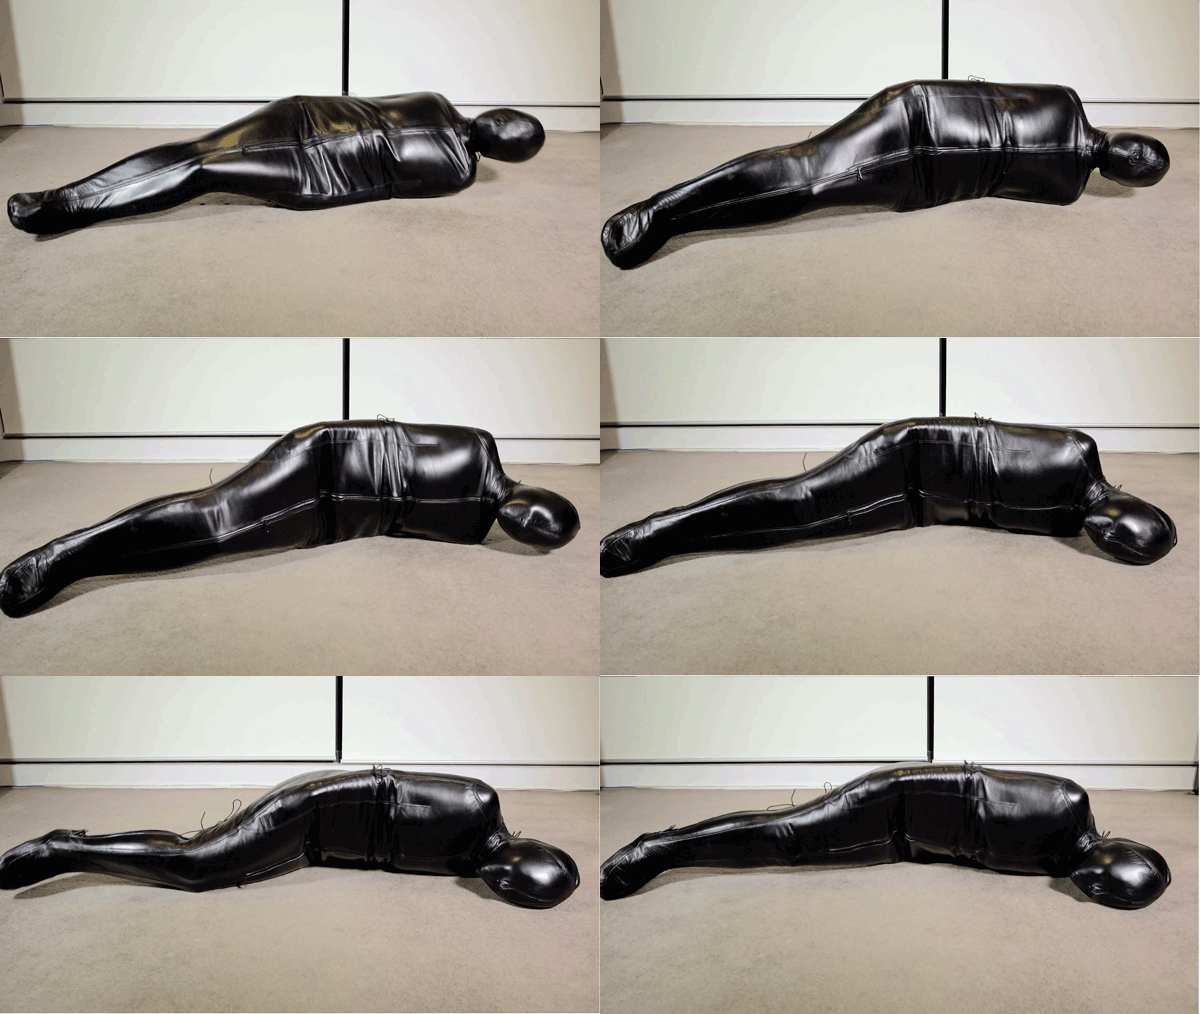
This side view shows the seamless tight fit from head to toe. Love the way you can see her hand at the end of the inner sleeve-pocket. 

Just 2 tiny nose holes: her only connection to the outside world. 

As if the sack were't intense enough, some added straps and a locking collar were added as well. Bravo, Mr. X! 

You see, this is no normal sack. It’s extremely intense. It’s made with an attached nose-only hood, and rear full-length zipper and lacing panel. It’s made of a very heavy weight waxy, deep black buffalo leather - selected to make the most restrictive possible experience for the slave (un)lucky enough to be zipped, laced and locked inside it. This sack was designed from the start to push the limits of restriction, of what a sleepsack could be in terms of severity and level of enclosure. On a scale of one to ten, this is a ten. It’s made to be laced extremely tight, and to completely remove the slave’s ability to move or wiggle in even the smallest way. You can ask him or her if it works as designed...

Fit fetish - laces tight from head to toe. Just lovely...

These shots aren't easy to take, as her face is in the bed, which could make it difficult to breathe. I am just blown away by the whole set of images! 

As you can see from the photos he sent over, it is close to perfect fit-wise. For a fit-fetishist such as myself, this is about the pinnacle for this type of restraint. The hood is seamless and smooth. Her shoulders, waist, hips and legs, all fit without a single wrinkle. The lacing panel, even though very tight, actually has room to go further...

The way that collar pulls the hood even tighter to her face, accentuating her jawline... Can it get any better? I don't think so. 

For those who don’t know: This is not an easy sack to get into, or to be kept in. First off, there are only 2 small nose holes to connect you with the outside world. This is a dark, extreme and intense voyage for those who dare. Not for those prone to panic. For advanced players and hood-lovers only! 

Total leather enclosure.
Mr. X promises to keep me posted on his upcoming experiments that he has planned for the sack and his slave. It lends itself to endurance training and punishment sessions. I could see some tease-and-denial or forced orgasm experiments that could be very interesting... 

Heavyweight leather nirvana. 
He’s getting ready to launch a pay-site and offer individual videos of sessions as well. I am really looking forward to him realizing the scenarios he has in mind, and can only hope the poor girl can handle it! 

The question I had: "So, how long did you keep her locked in?"
"Almost four hours" was the reply! It was only her first time!!
Future plans: Keep her in overnight?

Keep an eye on the Restricted Senses tumblr for more updates. And many, many thanks to Mr. X and his slave girl for allowing me to re-post the images here...


Laced Bondage Belt Pattern

$
0
0
Finally, here's the much-requested (and long-awaited) pattern for the bondage belt I made back in 2012. Click here to download the PDF. The step-by-step tutorial that goes with this pattern can be found here


Rear view with lacing.

Front view with D-rings at center and side seams.
 This is the master pattern used for such projects as the belt Ludella Hahn rocked on straitjacketed.com...

Happy crafting!

Thanks a million...

$
0
0

First off, I’d like to thank everyone for their interest in my work. I started thinking of creating this website after having a difficult time finding any information about leather crafting for BD/SM gear online a number of years ago. I decided if no one else had done it, why not do it yourself?  

It turns out that many people who do leather work professionally protect their methods and techniques as shop secrets, which I totally understand and respect. Unfortunately, that leaves us amateurs to figure out everything from scratch for ourselves. It’s getting a little better now, with more leathercrafters sharing their knowledge on forums or youtube. But it can still be hard to find people sharing perv-specific designs, patterns and techniques.

When I began the blog in 2010, I figured if I had about 5 regular visitors I would consider the experiment a success. 1.4 million page views later, the audience for the blog has far exceeded my expectations. The best part has been meeting pervy and creative people of all stripes from all over the world. If you have ever wondered if you’re alone in your interests, I can assure you that you’re not, and most pervs I’ve met in person have been kind, intelligent and otherwise normal-acting, fully-functional folks. It's been a blast. 

THANK YOU TO THE FOLLOWING:
I wanted to thank a bunch of people who have been longtime friends and supporters, including a few that aren’t with us anymore. I have to start off here with Mark at SeriousBondage.com, without whom this blog would never have happened at all. His site inspired me to do something to share this odd passion with others, and the fact that he linked to me with a banner on his homepage was the primary source of traffic to my blog for many years. Thanks Mark, for the support and inspiration! It wouldn't have happened without you.

Also, thanks to other friends, artists and inspiring people I’ve met along the way:
sammy, thisgirl, Meguca, -EM-, Elizabeth and Dave Andrews, Jeff Gord (RIP), Lew Rubens, Mumman, Dalton Ott, Karen Hsiao, PJW, Serene Isley, cyaneyedinbarclay, Londonropetop, Bob Bassett, Captive Kink, Kevin at Straitjacketed.com, JustJimAndWendy, Kate O'Brien, Le_Cordonnier, Fragileslave, Restricted Senses, and all my wonderful previous clients.

CUSTOM WORK
If you are interested in having something custom-made, I do apologize, but I could never find a way to make that whole process work. The reasons (in case you’re interested) break down into 4 categories:

FINANCIAL - It’s difficult to produce custom-items at a price point people are willing (or able) to pay. There is great amount of risk in making one-off pieces: a single mistake on the last step can result in a ruined piece, meaning I have to eat the entire cost of the raw materials - which is very high when it comes to leather. 

People are used to the cost of mass-produced items, so their frame of reference is often skewed. And for almost everything I make I’ve seen knockoffs (for less that my own cost of raw materials) for sale on eBay. People who appreciate quality and have the means to pay for it are as rare as hens teeth. 

Finally, I have a day job, and the prospect of making enough to replace that income from leathercraft is so remote as to be laughable.

Doing this has made me understand why quality leather gear costs so much, and why people who do custom work are so rare. It takes a lot of time, effort and an appetite for risk to make a go at it. 

TIME - I get a ton of requests for gear, but I don’t have the capacity to do them in a timely manner, so I mostly have to turn people down. I hate saying no, and it becomes a constant, ongoing bummer to answer my email or FetLife messages. At this stage in my life, I’m ready to shut the door on the whole thing. A “no” can set you free, and I need that freedom right now.  

DIFFICULTY - Dealing with clients and making a custom item based on their supplied measurements is a procedure fraught with risk. Even with the added step of making test-fit prototypes, there is a possibility for errors and problems in the final result. Creating custom patterns, then making prototypes is time-consuming and expensive, and in the end I may end up working for just a couple of dollars an hour. It’s just not worth the risk, and the expense/payoff ratio just doesn't work out. 

CREATIVE - I hate limitations, and when you’re working on a custom piece for a paid client, you have to do their bidding. That makes total sense, (it is for them, after all) but the thing I enjoy most is being able to follow my own ideas, wherever they may lead. The best-case-scenario is when my desire to make something aligns with the client’s vision, but that doesn’t always happen. 

I have many ideas for projects in the works that I haven’t seen anyone do before, and if I don’t make them, I don’t think anyone will. People can point to something once you make it, and say “I want one”, but I’m more interested in making things from my imagination that I haven't seen before, and without limitation of cost, functionality or aesthetics. 

Collaborating with like-minded artists and photographers has been profoundly rewarding for me, so it’s where I hope to focus my efforts in the future. I still plan to share projects and techniques along the way, and welcome feedback and questions anyone may have. Thanks for your time, the comments, and I hope you continue to enjoy the blog. 


Top Ten Things I Want to Make Right Now…

$
0
0
An assortment of posture specific suits and restraints (or hoods) I am dying to work on right away. In no particular order:

No. 1 - Full-enclosure suit with arms in front, pockets tightly securing the legs and feet together. 
No. 2 - Classic sleepsack with attached hood and attached armbinder. Rear-entry with full-length zipper from feet to top of head. 
 No. 3 - Sleepsack in a balled-up position with armbinder sleeves for the arms and toe-ring attachment point. Removable cover for pussy access. 
 No. 4 - Boot breather head harness. 
 No. 5 - Sleepsack with attached hood, front-arm pocket and high-heel foot pocket. 
 No. 6 - Leather hood with open mouth and flame-shaped eye openings. 
 No. 7 - Sleepsack with front arm-pocket that passes through the legs. 
 No. 8 - Hood with slit eyes. 
 No. 9 - Sit alone punishment sack. 
 No. 10 - Puffy sleepsack in lamb leather. 
 BONUS! No. 11 - Lotus sack with rear armbinder pocket. 
 Wish me luck...


Some More Design Sketches...

$
0
0
Here are some ideas that may take a while for me to get around to making (but wouldn't they be fun?). They are a bit higher up on the difficulty scale. 

Tandem Walking Suit: Pair of girls with arms bound in front, sharing a common boot.  
Butterfly straitjacket with attached foam-filled puffy hood. The ultimate in waist-up confinement and sensory deprivation. 
 Forced Kiss hood... A pair of perfectly custom-fit hoods, sewn together at the mouth. For this I need two people who really like each other! 
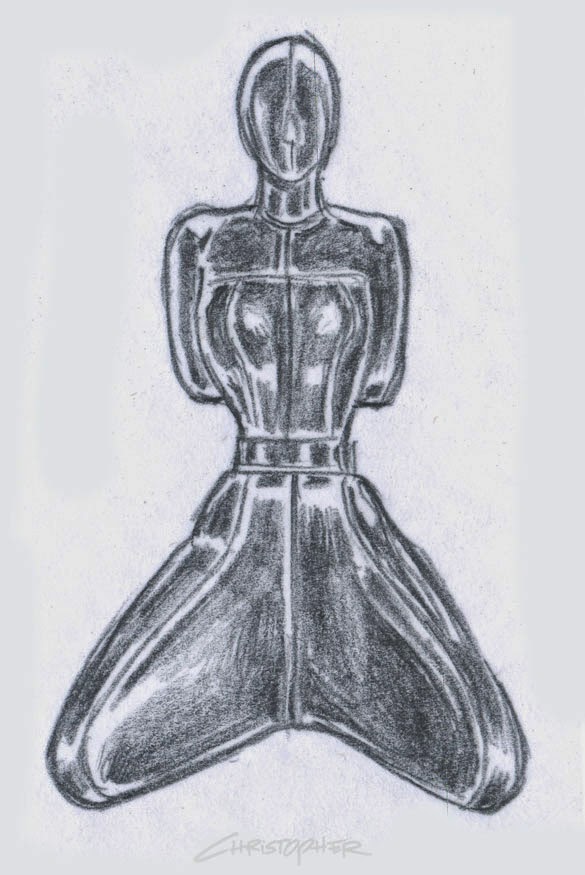
 Molded ballet boot with integrated handle heel - riveted construction. Inspired by Meguca's drawings of girls encased in metal (thanks Meguca!).... 
 Super-strict Y-suit with armbinder integrated and attached hood. She's not going anywhere...

Restricted Senses: Total Enclosure Sleepsack Struggle

$
0
0
Mina struggles beautifully in her heavy, dark leather prison. 

If you are a fan of sleepsacks like me, you probably have been waiting for (dreaming of?) a certain type of movie. It will start with a beautiful Asian girl smiling at you as she runs her hand over the heavy leather restraint she is about to be tormented in. 

Slowly, she'll slip in and wiggle seductively into her dark leather prison. Gorgeous body and beautiful face slowly enveloped by the dark shiny form. Next, the zipper is pulled down, encasing her head in a tight leather embrace. Then, pulled more, until finally the poor girl is fully enclosed, arms held at her sides by the internal sleeves. 


Laces pulled tight reveal every curve of her form. 
There is no going back for her now, no escape until you decide to let her go. She will wiggle around, struggling against her bonds, enjoying the embrace of her leather cocoon. Softly moaning and breathing heavy as she takes turns rolling over and resting - leather hood pressing tightly against her lips. 

After stewing a while, her laces are pulled tighter, molding the leather ever tighter against every part of her body: legs, fingers, ass, arms and shoulders. It's harder to move now, her breathing more labored. It's more difficult to roll over, but she is having fun trying. The struggle is beautiful to watch. 
Added straps and a locked collar complicate her predicament, yet she still manages to roll herself over.

And if you're a fan of the forced "O"... Well let's just say the ending is a happy one. 

Well, leave it to my friends at Restricted Senses to make this dream scenario come true using a sleepsack I made. It's such a great video: nicely lit and high-definition. At a completely reasonable price. Do yourself a favor: download the video here and enjoy this sublime piece of extreme bondage art. For me, this is a dream come true. 

Muffled laughter from our tightly-bound slave. Could it be she is actually enjoying herself in there?

Soft Pink Bondage set for EM

$
0
0
I'm happy to present a few beautiful images by "-EM-" a friend from fetlife who I consider one of the most talented bondage photographers working today. He doesn't claim to even be a real photographer, but I challenge you to find someone making such compelling, stunning and downright sexy images (check out his gallery if you don't believe me). He's proof that with passion and a good eye, formal training is not required to make drop-dead gorgeous bondage photos. Talented bastard! Oh, and it doesn't hurt that an assortment of beauties submit to his creative impulses, and allow the results to be shared with us. I did a custom hood and armbinder in pink for him to put to use, and this is the result:

Custom-fit ultra-tight laced armbinder in pink by yours truly, with matching nose-only hood. 

Just for reference: Armbinders: this is the way it's supposed to fit.


We have a few projects still on the drawing board. I'm looking forward to seeing them come to fruition...

Permaid arrives in LA!

$
0
0
For all you total-enclosure fans: Great news! A gorgeous creature by the name of Permaid has washed up on the beaches of LA. 

She has quickly adapted to life on the dry side of the ocean, securing proper summer reading material and a colorful beach towel. Even goggles: perhaps to keep in the moisture?  

Of course, being a citizen of dry land, she needs to do her time filling out forms at the DMV like the rest of us. I wonder if she can manage a stick shift?

All this flopping around must be tiring. Fortunately, she found a scenic place to rest...

I think I saw this in a comic book by LEE (The Bonders?) a while ago...

Permaid makes new friends while checking out the patio furniture at CVS. 

She even has merchandise available, and more to come I hope!
To find out more about Permaid, check out her website here, or follow her on instagram

Making Leather-Covered Buttons

$
0
0
So I got a new toy in the workshop recently: an Osborne button-making press. It all started when I volunteered to make a friend of mine a tufted leather headboard for her king-sized bed. Of course we needed matching leather-covered buttons, right? How hard could it be? 

My new toy!
 Turns out the Osborne W-1 Hand Button Machine press is very heavy-duty, and a lot larger than I thought it would be. It seems to be made for serious production work. The long handle gives you plenty of leverage, and you will definitely need to bolt this machine down to the workbench. 
A close-up of the business end.  
You have to order the proper die-set along with the machine to match the size of the buttons you want to make. I got the #30 which is for a 3/4" button, along with the blanks for the wire-back buttons, and the nylon tufting twine - each is sold separately. 


The die set consists of a cutter, a top and bottom die, an allen wrench, dowel and nylon cutting block. 
 The bottom die is a spring-loaded contraption which will take the wire-back part of the button. 
 There's a hole in the middle to accept the wire protruding from the back.
 The top die takes the leather blank and the part that becomes the front of the button. 
 It slides back and forth sort of like a piston. 


 The cutter is a nice beefy cookie-cutter type of circle punch. 
 Used with the nylon block, it should easily punch oodles of perfectly-sized leather circles. 
 To begin, place the nylon block in the press. 
 Place your leather on top of the nylon block with the cutter on top of that, roughly centered under the top plate. 
 Apply some pressure to the handle and you get a satisfying "chunk" as the circle cutter slices through the leather. 
 At this point, I'm going to pull out the skive to shave the leather down a bit, thickness-wise. I tried to make a button with the full-thickness leather, but it was a no-go. I think the whole machine is set up for thinner upholstery cloth-covered buttons, so it takes some fine-tuning to make the leather work with these buttons and dies. 
 In case you don't know: the skife is a razor blade knife where there is a slight curve to the cutting edge. This is perfect for shaving down the thickness of a piece of leather in a controlled manner.  
 I work on a piece of glass, because every other work surface I have would otherwise be damaged by the knife. 
 We're starting with a 1.07mm thickness on the leather. 
 After shaving the backside down carefully...
 ...I end up at .68mm thick. It makes all the difference in the world. 
 We're ready to grab our button blanks. One for the front, and one for the back. 
 Take the top die.
 Place the leather blank face-down into the die. 
 Take your blank button front.
 Place it face-down in the center of the top die, and push it into the hole. 
 Use the dowel to push the button front and leather all the way down. 

 You should be able to see leather all around the button face.
 Now take the bottom die. 
 Load it into the machine (you can secure it with the allen wrench set screw). 
 Place the wire-back of the button into the bottom die. 
 The wire should be facing down.
 Take the loaded top die...
 ...and place it on top of the bottom die. 
 Pull the handle down, and you should get this: 
 At least that's what I got at first: a messed-up button. See the cut along the edge? Too much pressure. 
 I found it handy to use a little screwdriver to remove the finished button from the die. 
 Try again, and with a bit less pressure you can get the button to turn out okay (without the cut through part). 

 When they turn out right, the leather tightly wraps around to the back, and the whole thing is held in place through crimping and pressure. It's almost magic. 
 I probably messed up one button for every two that turned out, but I'm sure with practice I could do even better. I'd recommend giving yourself time and extra leather to get the formula down pat. 

 I went ahead and got the tufting twine, as I didn't think any of the threads I have could handle the extreme tension these buttons will place on it. 
 I used a heavy-duty needle to thread the buttons through the sewn seams. 
 I put both ends of the thread through the eye of the needle. 
 I found I didn't need a pilot hole, I just put the needle in the center of the seam and pulled it through to the backside. 

 Given a decent tug, the thread and wire back nestled between the stitches and sat nicely in place. Check back later, and I'll show you how the finished project turned out. 

A Tufted Leather Headboard

$
0
0
The final result.
For my tufted leather headboard project I started out with a piece of 3/4" thick birch plywood. I wanted the finished piece to be sturdy and flat, so I opted for this rather than the 1/2" plywood some people use for headboards. 

I divided the space up into 11" squares, so the panel was cut to a final size of 77" by 33". 
I cut my leather into twenty-one 11" squares (plus an added seam allowance all around each piece). 
 I carefully matched for grain and texture on the front side before sewing, and each piece is marked on the back so it will end up in the correct location and orientation. 
 I sewed the horizontal seams first, then joined the sections together. 
 
Because this leather is nice and thick, I didn't have to worry too much about stretching. It's such a pleasure to work with this stuff! (It's a white "Sensation" hide from Sav-Mor leather in LA, for those of you who may be interested.) 
The seams just aligned nicely without any difficulty. I love it when that happens. 
I cut 3" side strips for the edge of the headboard, and an additional 2" strip for securing the leather to the back side with staples. 
 
I sewed the side strips together first, then the side is clipped and sewn to the front panel. 

At this point, I'm ready to start building the headboard. I first glued the 3" foam together and to the plywood backing using spray adhesive. Although you can't see it very well in this picture, I had used a 7/8" punch to create a path for each of the button's twine to pass through the foam. 
I had my 12 perfect leather covered buttons ready to go (See my previous post here if you want to check out the process of making them). 
I pull the leather into place over the foam. 
I put both threads through a heavy-duty sewing needle... 
...and used that to set the button in place at the intersection of each seam. 
I left the thread long enough to have plenty to work with once I started tufting and tying them off. 
At this point I pulled the leather tight and stapled it in place along the back side. 
 
 For securing the button twine in the rear, I created a set of wooden pieces each drilled with 2 holes. I wanted to have a strong connection point that would lay flat. 
 One by one, I pulled each button tight and tied it in place. 
Overall I'm happy with the way the headboard turned out. I feel like I learn so much every time I tackle a new project, and this is no exception. I have a new found respect for people who do upholstery on a daily basis: let's just say my fingers were sore for days afterwards from pulling on that twine. I do hope to do more furniture, and have lots of ideas involving leather and foam...


Thanks for stopping by!

Butterfly Straightjacket with Attached Padded Hood

$
0
0

Just wrapped up a project that I've been thinking about for a long time: a padded 2-layer hood attached to a butterfly straitjacket. I classified this among the "not likely to be done any time soon" project sketches, as it was going to be difficult to make, as well as challenging to wear. 

The no-compromise design includes a rear lacing-only entry, which makes getting into and out of the jacket a time-consuming task. I didn't add a zipper for speed or convenience. 

The hood, which is essentially an inner and outer hood with a foam layer in between, creates a real buffer between the wearer and the outside world. Best used when the weather isn't too hot. 

The breathing tube is another aspect that makes the restraint even more intense. If you forget to mouth-breathe and try to breathe through your nose, the leather will just press against your face and remind you just how stuck you really are. 

Finally, the arm pockets are pared down to create the tightest fit yet. I'm always trying to find the trade-off/boundary between tightness and comfort, and we may just about be there. It looks fantastic in real life. I'm so very happy with it, and the testing sessions are going much better than expected. 

Padded Hood Process

$
0
0
The padded hood started out with an inner hood made of lamb leather. 
Initially I was going to put the smooth grain side on the inside, but decided it would be more comfortable with the "suede" side of the leather facing in - it can get sweaty with the smooth side facing in, and with the 2 layers plus the foam, I was worried it might get too hot inside. Maybe next time...
I had to come up with the shapes for the foam pattern pieces, which I wanted to be very form-fitting but have the fewest number of seams. Right away a center strip started to suggest itself as a solution. 
I could cut a hole for the nose, and cover the sides with 2 additional panels. I wanted only the head to be foam padded, with the neck fitting as tight and close to the skin as possible. The visual contrast between the puffy head and slim neck is what the project is all about. 
The next step was to wrap the foam with pallet-wrap, just to hold the foam panels in place. 
Next, a duct-tape wrap, which I'll use to create the pattern. 


I'm leaving the back open so I can remove the wrap. 
I use a marker to indicate possible lines for the seams. 
A peek at the foam panels inside the wrap:
Here are the pattern shapes I came up with: two sides that wrap around under the chin, and a single-piece front panel that meets the rear lacing panels at the top of the hood. 
The first seams sewn are the under-chin and top-of-the-head seam.
Before sewing the rest together, I check the fit on the hood form, and decide to create darts on the two side panels to make a tight-fitting contour. 
Now I'm ready to assemble the hood. I start by using spray adhesive on both parts to hold the foam to the lamb inner hood. 
I draw the outer leather hood over the inner being careful not to pull the foam out of position. 
It's kind of tricky, as the fit is tight and there is a lot of drag between the outer hood and the foam. 
Eventually I get it worked into place, and clip the 2 hoods together along the rear opening. 
From there I remove the hood from the form and sew the two hoods together along the rear opening. Fortunately, everything is lined up, and I'm able to punch the breathing hole through the outer hood. Things seem to be where they are supposed to be. 
I add the grommets and lace the hood back onto the form to help set the shape. 
The next day, the hood gets clipped and sewn to the butterfly straitjacket body. 
I add the breathing tube, which is just held in place with a friction-fit. 
Came out great! Ready for testing...

Making the Boot Breather!

$
0
0
I finally had the chance to work on the boot breather, one of my "Ten Thing I Want to Make Right Now" projects. The design sketch is below, and you can see it's sort of a cone shaped device designed to held in place with heavy straps that buckle around the head. I wanted a design that could be used with a hood and posture collar, something to ramp up the sensory experience of the sub in question: a device to force breathing of the leather-infused air inside of his mistresses high-heeled boot. 
So we begin with a wrap of the head form. We're going to wrap the form in tape, and the plastic wrap makes it easy to remove. 
My nest step is to build a plug with foam and pallet wrap to get the shape of the snout correct. I want this to fit airtight on a variety of boots. 
 
I start with a classic pair of Enzo's I had around the workshop. 
Then I went through my wife's closet and pulled out all the leather-lined boots I could find. 
 The shape seemed to fit them all pretty well... with pull-ons...
 Even the Italian beauties:
 And the sexy pointed-toe stilettos. 
 Once the shape and size of the snout checked out, I just attached it to the head form using tape and more plastic wrap. 
 I ended up cutting the nose a bit shorter, as it didn't need to be that long to work properly. 
 I start defining the form with duct-tape. 
 Referring to my sketch, I am wrapping just as far back as needed, and I am placing tape where I want the straps to go.
 I use a sharpie to indicate the shape of the lines for the edge of the piece, along with contour lines for the seams. 
 Once I'm happy with it, I cut the duct-tape off of the head form, and break it down into pattern pieces. 
 Here's where we end up: Three parts for the front of the breather, and a 2-part back piece to hold the 5 buckles. 
 Here we have the preliminary pattern pieces, ready to prototype. 
 This is where the scrap pieces come in handy. I had a nice piece of heavy, waxy leather that would be perfect for this project. 
 Parts get cut out, clipped and sewn together. 
 Got a really nice shape and fit on the first try: 
 After making the outer form, I realized I needed to figure out the shape of the stiffener for inside the snout. I used more duct tape on the form, and placed the foam back on as well: only this time it was squeezed down a bit so it would fit inside of the workpiece I had already created. Here you can see the paper shape in place: 
 And here is the paper form with the boot breather on top of it: 
 Once I was happy with that inner reinforcement shape, I cut the final piece out of "bag stiffener." This stuff is like a heavy cardboard for providing reinforcement to handbags and other items. You can get it at Tandy or here at Springfield Leather
 I spread the glue on what will become the inner surface of the snout...
 ...and on the bag stiffener cut to the proper shape. 
 Here's an inside view of the bag stiffener glued in place inside the snout: 
 Next I worked on the pattern for the rear buckle panel. This is really a belt with 5 straps. I had to take each strap end and extend it enough to hold the buckle in the proper position. 
 I had to make sure to give a generous seam allowance all around so there would be plenty of leather to wrap around. 
 That piece is cut out and glued...
 ...and all the seams are turned to create the final curved shape. 
 Once the edges are turned, the whole thing is topstitched along the edge. 
 I make up a set of belt-keeper loops and straps to extend the length of the straps on the face of the mask. 
 The keepers and buckles are riveted in place. I went with a 1.25" buckle, to intentionally give the piece a "heavy-duty" look and feel. 

Check back later to see how it all turned out...

Viewing all 77 articles
Browse latest View live